Bell peppers are very tasty and they come in many different colors: green, yellow, orange, purple and red. There are also many ways in which you can use bell peppers, both cooked and fresh. You may also freeze them to have them throughout the whole year.
Bell peppers are excellent vegetables to grow. There are many varieties to choose from, and many different ways to use these vegetables. All you need to do is to provide some care to make them thrive.
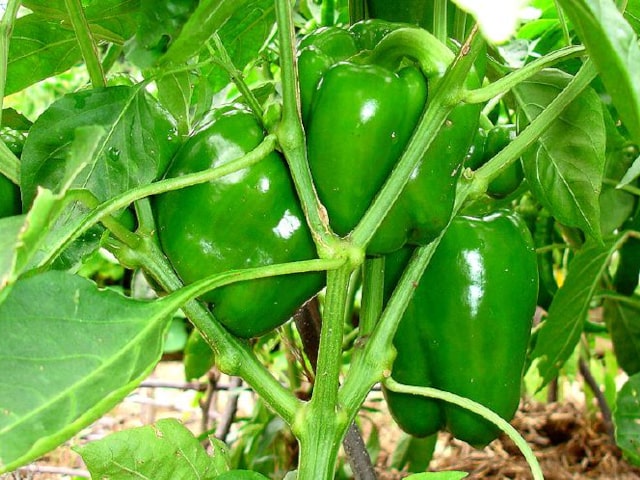
Bell Pepper Varieties
Before you plant your bell peppers, you need to decide on the variety you wish to grow. It's important to know that a pepper variety can make all the difference. However, it's also important to know that certain varieties grow better in some climates than the others. This is why it's important to make sure that your chosen bell pepper variety can thrive in your climate.
It's also vital to know that a long, humid growing season present in many climates will also expose your peppers to numerous problems. This is why it's important to choose a variety known for disease resistance. It's very important to choose a variety known to be resistant to tobacco mosaic virus and bacterial leaf spot.
If you wish to have a continuous harvest, choose a large plant variety with lots of foliage. Compact plants don't have enough long side stems to support heavy fruit, nor do they have dense enough foliage to shield the fruit from heavy sun.
In case you are unsure on how to choose the best variety, you may test several varieties side by side for a few seasons. Keep only the best varieties that can thrive in your garden. It's also a good thing to always test some new varieties so you can always introduce some new bell peppers to your garden.
Some of the best bell pepper varieties include:
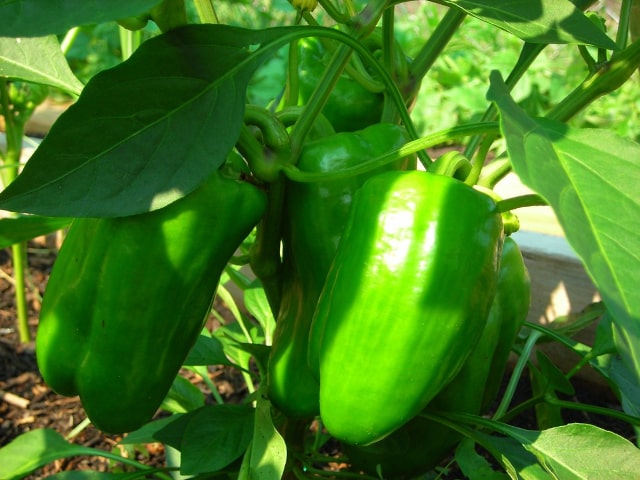
- Green bells: Camelot and Galaxy. These varieties give blocky, four-lobed fruit. These peppers are chosen mainly because of their shape. It's important to know that they will all change color when mature.
- Red bells: Elisa. This is an elongated, four-lobed variety. It is very resistant to diseases.
- Yellow bells: Orobelle. It has blocky, four-lobed fruit. It can also make a good green bell if you harvest it early.
- Orange bells: Valencia. It is very sweet and tasty.
- Purple bells: Islander. It has very beautiful fruit.
- Thin-skinned bells: These peppers have long, narrow fruit. They are great for salads and grilling. They are known to mature early. The best thin-skinned varieties are Aruba, Biscayne and Corno di Toro.
Preparing the Soil
For the best success with bell peppers, it's important to prepare favorable growing conditions. Preparing the soil is very important and will help you grow strong and healthy bell peppers. If you prepare the best growing conditions, chances are that you will be able to make the most of the growing season. It's not unusual to start bell peppers in May and have them grow until the first frosts in October or even early November. However, to achieve this, it's absolutely vital to have everything nicely prepared.
First of all, pick a planting site suitable for growing bell peppers. Make sure that you haven't grown tomatoes, eggplant or potatoes at this place for at least 3 years. Since these plants have the same soil and leaf diseases as the bell peppers, it's best not to plant them on the same place.
It's best to choose well-drained loam or sandy soil to grow your peppers. The heavier the soil, the more organic materials you'll need to add.
Another thing you need to do is to test the soil for minerals. Remember, a well-balanced garden soil will have all the minerals a plant needs: phosphorus (which helps root develop), potassium and calcium. These minerals are very important for bell peppers, so make sure your soil has them.
Keep in mind that your growing peppers might need additional calcium and potassium. These elements will encourage the growth so you will get peppers with nice, thick walls. These peppers taster better and are more resistant to fruit rot.
Another thing you might consider is a cover crop. A good choice for a cover crop is clover or wheat. A cover crop will stabilize the raised beds through the winter, which prepares the soil for planting in the spring. Before you plant the peppers, it's important to turn the cover. It will decompose and provide the much-needed nitrogen to the soil. Your bell peppers will benefit from this nitrogen.
Starting Seeds
It's best to start your bell peppers with seeds. Prepare your seeds in a well-drained potting mix. You will use this mix to grow seedlings you will later transplant in your garden. Make sure that your potting mix is high-quality and can keep the seen moist and warm. The ideal temperatures for germination are between 70 and 80 degrees F. It might be useful to use a heating mat under the seedling flats. If you can't use a heating mat, pick any consistently warm place in your home. For example, you may keep the seedlings above the refrigerator.
Remember to separate plants in the seed plat by at least two inches. This will ensure the best growth. When the first true leaves develop, start fertilizing your seedlings with a balanced liquid solution. Fish emulsion and kelp mixture seems to work best.
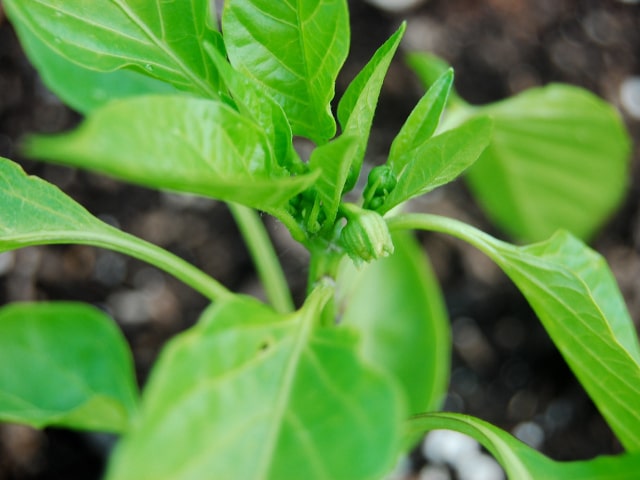
Observe your seedlings. Watch for the cotyledons (the first leaves appearing before the true leaves). Healthy seedlings have vibrant, green cotyledons. In case they are yellow, it indicates the lack of nitrogen.
Seedlings are usually ready for transplanting after about eight weeks. A week or two before you decide to plant them in the garden, make sure to gradually expose them to the outdoor conditions. This will harden them a bit so they will be strong enough for transplanting.
Preparing the Beds
It's also important to prepare the raised beds before transplanting. Start about three to four weeks before transplanting. Turn under your cover crop so it has time to decompose. Also, the soil will get the chance to warm in direct sunlight.
Before transplanting, it's also important to kill any potential germinated weeds. It's also a good time to add some nitrogen, if needed. Bell peppers need about 1 lb. of nitrogen per 500 sq. ft. A good cover crop will usually provide all the needed nitrogen, so chances are that you won't need to add some more.
Finally, it's useful to install a drip irrigation system dawn the middle of the bed. You don't have to use drip irrigation to water your bell peppers, but it can sure help them grow and it reduces the work needed.
After you have prepared the soil and your raised beds, it's time to plant your bell pepper transplants. For the best results, it's good to plant bell peppers in two rows per bed. Make sure that the rows are about 12 inches apart, with individual plants 18 inches apart. This will ensure the air flow between the plants, which will reduce the diseases.
It's useful to leave a wide path mulched with straw between the beds. This will also help with the air circulation. Also, it gives the plants enough room to grow and enough room for you to move around the garden. The mulch itself will help ripen the fruit evenly. Also, mulch will keep the soil cool during the hot periods of the year and it will up humidity a little. Remember: while bell peppers need heat to start growing, they will not start producing fruit if it's too hot.
Make sure that night temperatures are under 80 degrees F and the day ones below 95 degrees F. Higher temperatures will make the flowers drop so they won't produce viable pollen. Mulch will help reducing the temperature a little.
Transplanting
When transplanting your bell peppers, make sure to do it gently so you won't hurt the plants. it's also best to choose a cloudy day with no wind for transplanting. After transplanting, it's important to give your plants some good watering and also some fertilizer solution.
The transplanting itself is best done with a trowel. Set the young plants carefully in the soil. They support themselves best if they are planted a bit deeper than they were in the seedling flat. In case you live in a hot climate with sandy soils, you may plant the seedlings up to the first true leaves. This will put their roots down into the cooler, moist soil. In case your garden soil is heavy, it's important to plant your bell peppers a bit shallower. This will reduce the risk of stem blight that can develop in waterlogged ground.
Growing Your Bell Peppers
After transplanting, make sure to water your peppers regularly. Give them 1-1/2 inch to 2 inches of water each week. They should grow like crazy, so all you need to do is to keep the favorable conditions and watch for the pests.
The main pests bell peppers have are caterpillars of the European corn borer and the corn ear worm. They are a problem in mid-July, so this is when you should watch out for them. If you notice some pests, it's best to use a good pesticide. Organic pesticides work the best: they will get rid of the pests but won't damage the plants or the environment.
Another thing you need to observe are the leaves. They should always have dark green color. If the color is lost, it's a sign you should feed your plants. It's best to use some liquid fertilizer. Your fertilizer should have a bit of nitrogen (though your peppers don't need much). The more it rains, the more often you'll need to fertilize, because nitrogen is easily washed out from the soil. Make sure not to feed your bell peppers with lots of nitrogen: this may reduce the amount of fruit you might get.
Harvesting Peppers
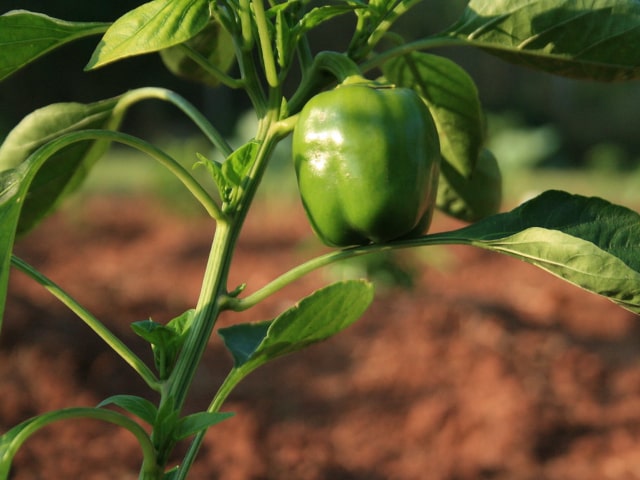
About 50 to 60 days after transplanting, you may begin picking peppers. The green bells are always the first ones to be harvested. If you want peppers of other colors, you need to let them mature a bit more.
Usually, it's best to pick the peppers once per week. Start picking from the lowest fruits to the top. Early harvest will also encourage your bell peppers to produce more fruit. This early harvest should happen in July.
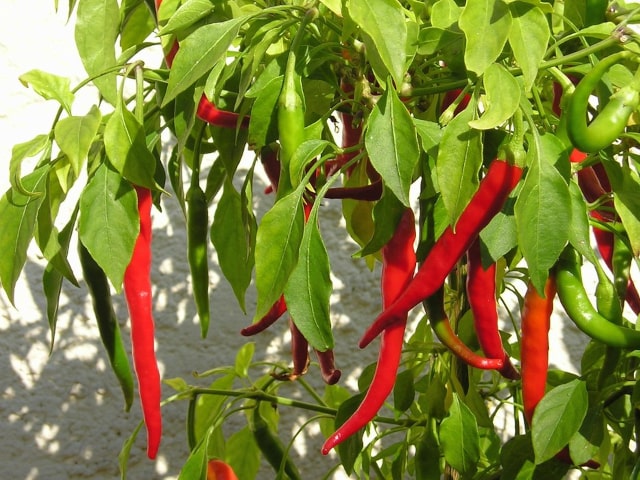
In early August, stop picking peppers and let them mature so you can get peppers of other colors. Maturing make the peppers taste sweeter. Start harvesting your matured peppers late in August. Harvest one per week for the next two months. You should harvest all the peppers by the time of the first freeze.
Additional Tips
- It's best to grow your peppers in a well-drained soil that can be freed up for the growing season (spring to fall).
- It's important to remember that your peppers may need a nitrogen boost in mid to late July, which is when they develop their fruit. This is when you should feed them.
- To prevent diseases, it's best to separate your pepper plants by 18 inches. This way, they will have enough room to grow, with enough air circulation.
Photo credit: ajot
0 Comments