Organic, ocean-grown sponges can be expensive. Even if you need to spend just a few bucks on a smaller one, it's still money you can spend elsewhere. The truth is, you can get excellent, home-grown sponges for free from the loofah ‐ luffa gourd. For a price of the seed and with some care, you will get an exotic plant that will give you enough sponges for years to come.
Plus, the sponges you grow yourself will be bigger and more durable than commercial or organic ones. Luffa sponges can be used to scrub bathtubs, sinks, kitchen utensils, car windshields, and more. They are very durable so they can take it all. At the same time, they are very gentle and completely natural so you may use it for showering.
Of course, sponges are not the only reason why you might want to grow luffa, but they sure provide an additional motive to plant this gourd in your garden.
About Luffa
There are many different types of gourds people choose to grow. However, the so-called "dishrag gourds" are often unfairly overlooked. People used these gourds in the past in many different ways, for example, as a nest egg in the kitchen house, a dipper at the well or a bowl for salt.
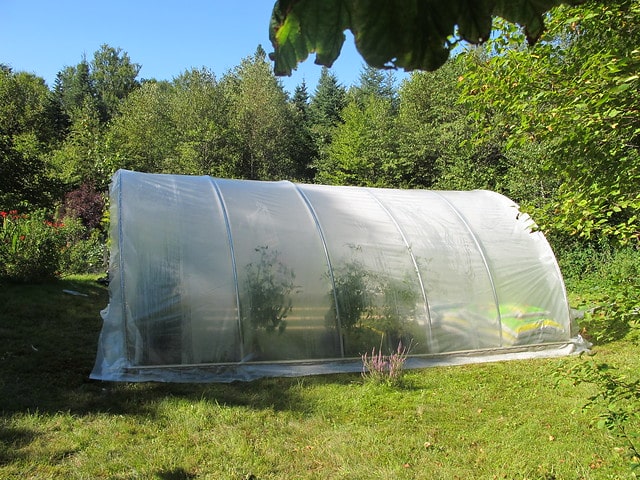
Loofah "dishrag" gourd is an interesting plant and you can use if to make durable sponges. Luffa (Luffa macrocarpa) is a tropical plant and it needs a long growing season so the fruit can mature properly. If you're located in the north, it's best to start the seeds early indoors and set the plants outside after the frost and when the weather is warmer.
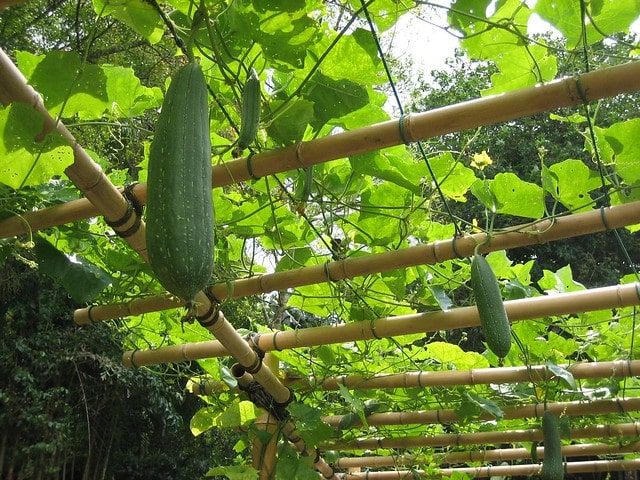
This gourds are long, between 6 inches and 2 1/2 feet. They have beautiful vines with large leaves. The leaves resemble those of the sycamore tree. They can quickly cover a fence of trellis, which is why they can even be used as decorative plants.
If it's a good year, the vines will fruit so heavily that you will need to use some support for them. Don't allow them to run along the ground because the fruits need to hang so they can develop properly.
Luffa sponges are long, cellular growths located within melon-like rinds. When you peel them off, you can see the sponge-like, fibrous interior filled with dark seeds. There are many of these seeds, but it's easy to remove them through a hole located at one end of the sponge. It's really easy to squeeze the seeds and rinse the sponge to make it ready for use.
How to Start a Luffa Plant
If you wish to transplant your luffa plant, it's probably the best to start the plants in paper cups. This will make them easy to transplant when the time comes. A night before the transplant, water the paper cup. To transplant the plant, dig a hole, peel the paper cup from the plant and make sure not to disturb a root. Set the cylinder of soil gently into the hole.
You shouldn't use this method to handle the entire crop, but it can give you a certain advantage on the season with some plants. This is a good measure for those who live in the north and don't have long enough growing seasons. If your growing seasons is long enough to successfully allow the luffa gourds to mature, then you don't have to worry. However, it's always good to give your plants an early jump.
Making the Luffa Sponges
To use your luffa to get sponges, it's important to choose old, dried out loofah in which the fibers have formed. Generally, loofahs are cut before the fibers form so they are easier for eating. Therefore, a loofah you buy from that store might not have grown fibrous enough. To get the best sponges, you should use a mature plant.
Getting the sponges:
- Take a mature gourd and peel off the outer layer.
- The inside part of the gourd is used as a sponge. To prepare it for use, you need to remove the seeds. The gourd has a hole so it's usually easy to remove all of the seeds from the gourd very quickly. Make sure to save the seeds after you remove them so you can plant the next year's crop.
- Cut the loofah in 3 or 4 sections, depending on how large you want your sponges to be.
- Soak the sections into warm, soapy water. You may even use a little bit of bleach to make it completely disinfected, but this is usually not necessary. It's often enough to scrub and rinse the gourd until all the dirt is gone.
- Let the gourds dry out.
This is it: you made your own sponge! It's ready to be used in the kitchen or shower.
Photo credit: Ivan Lian
0 Comments