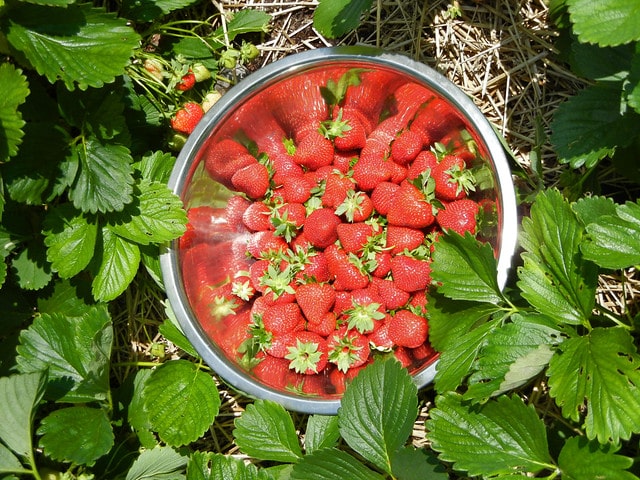
Growing your own strawberries can be very rewarding. Having your own, fresh and tasty strawberries is a great way to offer healthy food to your family. Homegrown strawberries tend to be better than the commercially-grown ones.
The good news is that you don't need a lot of space to grow your own strawberries. You can grow them in containers on your balcony, deck or patio. All you need are 5 gallon buckets. You can use these buckets to build handy strawberry towers. It's all you need to grow your own strawberries to a great success.
A handy strawberry tower is a great way to grow your own strawberries, especially if you have only a limited space in your home.
Tools and Materials
To build a strawberry tower, you will need the following tools and materials:
- 5 gallon buckets (two)
- Lining material (about 30" x 36"). Good ones are burlap, weed cloth or garden cover.
- Spray paint (optional). You will need about 1 can.
- Soaker hose (1/4") and spaghetti tubing (1/4") if you want to use drip irrigation.
- Pliers (1-2 pairs).
- Hacksaw.
- Hand drill.
- A 2" diameter hole bit.
- Flexible tape measure or cloth.
- Marking pen.
- Sandpaper.
- Safety goggles.
- Clothspins (several).
For planting:
- 30 Strawberry runners, plants or starts (depending on what you want to plant).
- Potting soil.
- Compost or time-release fertilizer pellets (mixed with the potting soil).
Instructions
To make a strawberry tower, follow the instructions:
1. Prepare the Buckets
The first step is to cut the buckets. Use the pliers to remove the metal handles from the buckets. After this, measure about 1/2" from the bottom of the first bucket and mark this distance using a marker. Make sure to mark the distance all around the bucket. You will use it as a sawing guide. This line should be placed in a way that when you saw through, it will cut the bottom off but nothing else.
Do the same for the other bucket, but this time, mark the line 1 inch to 1 1/2 inches up from the bottom. This way, the second bucket will be 1/2 to 1 inch shorter than the first one.
Once you have cut the bottoms from both buckets, use the sandpaper to make the edges smooth. Make sure to remove and hanging threads of plastic remaining on the cut parts of the bucket.
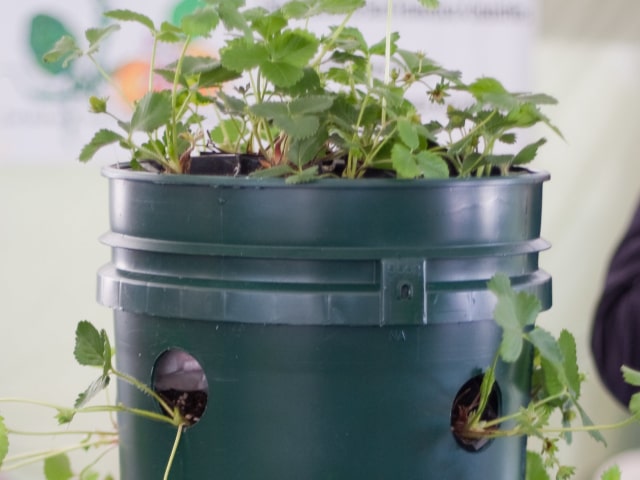
Insert the longer bucket (bucket two) into the shorter one (bucket one). The buckets should nest easily into each other. They should fit without a problem and rest tightly. In case they are too tight, sand the shorter one a bit more until it's wide enough to accommodate the other bucket. Once they fit perfectly, you are ready to drill the holes.
2. Drilling the Holes
The next step is to drill the holes on the sides. Mark the place when you want to make holes using a marker. Put the holes about 4 inches apart. Start just under the thick rim of the bucket and drill the holes all over. Mark about 5-6 holes for the top row, making sure they are 4 inches apart. Don't put them in the straight line. In fact, a bit variation works better. After this, mark the second row about 4 inches below the first one. For this row, mark the holes with staggered placement: not directly under the top holes but off set between them. Continue doing this for the third row and so on, until you reach the end. However, make sure not to mark too close to the very bottom. Keep in mind that the buckets will go inside each other.
Make sure to wear the safety goggles for drilling the holes to avoid plastic dust reaching your eyes. Use the drill to make 2" holes. Drill carefully in the side of the bucket following the marks. Do this for both buckets. After drilling, make sure to use sandpaper to smooth down the edges of the holes.
3. Painting
This step is optional, but it makes for a prettier tower. If you choose to paint the buckets, this is the time to do it. Spray paint the outside surface of the each bucket (while keeping the buckets separated, of course). It's important to choose a spray paint made for PVC or plastic so it adhere to the bucket without a problem. Wait until the paint is completely dry before you move to the next step. Consult the directions on the can for the time needed for the paint to dry.
4. Build the Tower
This is the time to assemble your tower. Fit the buckets (the longer one into the shorter one). This will make the base of the tower. It's easiest to do if you simply slide one bottom into the other and twist them together. Make sure they are tight and standing as straight as possible. This is important so your tower doesn't lean over.
Choose a sunny spot near a water source to place your tower. Line the tower with the covering material of your choice (burlap, weed block cloth or garden cover material). Make sure to cut the piece of the material in the same height as the tower. The width should be about 36 inches - make sure that it's a bit wider than the inside circumference of the tower. Carefully, place the material inside the tower. You should also overlap the edge of the lining where the ends meet. Use clothespins to keep the material in place while you work.
The next step depends on the water source you wish to use. If you want to hand-water your strawberries, skip the next step. If you want to use a drip irrigation line, consult the next step.
5. Drip Irrigation
If you want to use drip irrigation, you should install it before you fill the tower with soil. Attach 1-2 1/4" soaker hoses to the line and 1/4" spaghetti to the tower. If you want two soaker lines, use a tee connector. You can easily run the soaker hose using one of the holes on the side of the tower (use it to run the hose up from the bottom). You can also run the hose down from the top of the tower, and in this case you should secure the end of the hose at the ground level. Make sure that the hoses run vertically through the center of the tower. This will ensure that the plants get enough of water. Skip this step if you want to use hand-watering to water your strawberries.
6. Filling the Soil
This is the time to add the soil. Simply fill the tower with soil mixed with compost (or a time-release fertilizer pellets). This type of a potting soil with amendments is the absolute best medium for growing strawberries. Keep in mind that the potting soil itself has a great drainage, which is important for strawberries. However, it usually lacks some nutrients, so it's important to mix it with 1/3 finished compost or time-release fertilizer pellets (use the ratio recommended on the package). The pellets will provide your strawberries with nutrients in the 3 month period, and same goes for the compost. Keep in mind that strawberries need nutrients so it's vital to provide them with compost or time-release fertilizer.
When adding the soil, work slowly and carefully. Make sure to gently pat the soil down as you go. This will prevent the settling of the soil after the first watering. As you fill the tower, the soil will hold the lining in place so you can remove the clips you used to hold the lining originally.
It's best to fill the tower up to the top because the soil will settle after a short time. In case you're using a drip irrigation line, make sure to keep it vertical and centrally placed as you will the soil.
7. Planting
After the soil is ready, it's the time to plant your strawberries. Use a pair of scissors or a pocket knife to make a slit in the lining at the each of the holes on the side of the tower. Make small holes in the soil through the holes in the bucket using your fingers. The holes should be deep enough to hold the root of the plant. Gently and carefully, place one strawberry plant or runner per hole.
Place the plant through the slit and into the soil. After placing the plant, firm the soil around it.
Repeat this for each hole. After this, plant about 3-4 remaining strawberry plants at the top of the tower to finish it. You may wait a few days until you plant the top strawberries. It's important to wait for the soil to settle. After this, add more soil up to the rim of the tower and then plant the top strawberries.
8. Watering
Once all of the holes on the side of the bucket are planted with strawberries, give your tower a good watering. In case you use drip irrigation, turn the system on until the tower is moist (but not soaking wet). If you use hand watering, make sure to water the tower gently from the top. It's best to use a narrow-spouted watering can. It will enable you to water directly into each of the holes so each strawberry plant will receive enough water.
Photo credit: paul pod

1 Comments
Great idea. I'm going to try it.
How does one refertilize in subsequent years so one doesn't burn the top plants while starving the lower ones?