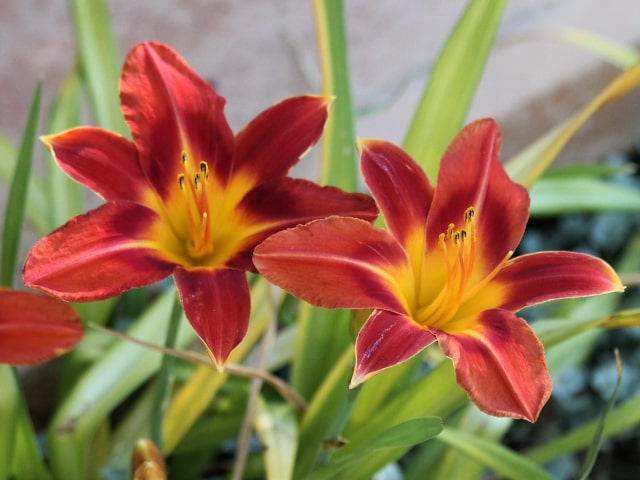
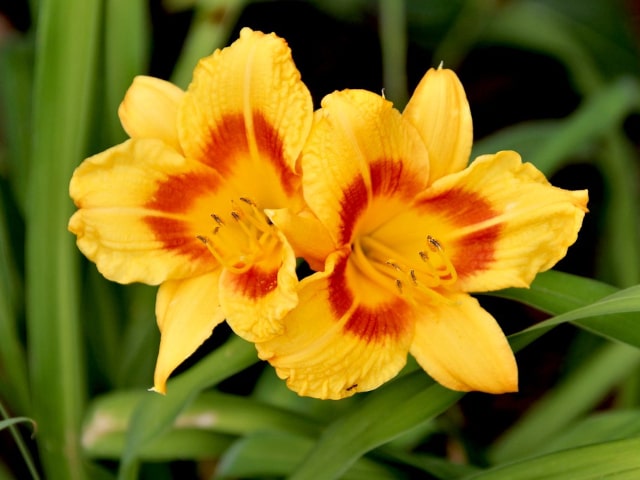
Daylilies are beautiful, gentle and will bring color to any home or garden. Daylilies are members of the genus Hemerocallis and they are known for their brightly colored flowers. They flower in mid to late summer.
As their name says, each flower lasts for only one day, but with so many blossoms (multiple flowers on each stem), the flowering of daylilies lasts for about 3 weeks during the summer for most cultivars.
It's worth noting that there are about 60,000 different daylily cultivars. They range in color from white to yellow, orange and red. There are even certain cultivars with brown and violet flowers.
Daylilies are perennials and they are very sturdy. In fact, they are known as tough plants and they don't require much care. They adapt with ease you can grow them in basically any type of the soil and in many different weather conditions.
To make them thrive, it's best to keep them in full sun. They produce more flowers if they are divided periodically, so every daylily owner should know how to divide these plants to make them thrive and give even more of those beautiful flowers.
Division will not only promote your daylilies to produce more plants but will also expand your "collection" of daylilies. This is also a great way to share daylilies with your friends. Dividing these beautiful plants is not difficult but should be done with care. If done properly, you will be rewarded by more plants and more gorgeous flowers.
Dividing Basics
The first thing you need to determine is when it's the best time to divide your daylilies. It depends on the plants in question, but generally speaking, the best time to do it is in the late summer. During this period your daylilies will have strong enough roots: their roots will have enough time to grow before the winter. Since daylilies are hardy plants you can divide them from early spring to mid fall, but the best time is definitely after they have finished flowering, which occurs in late summer to early fall.
Therefore, late August or early September is just the right time for dividing daylilies.
When it comes to the plants themselves, the right time to divide them is when they become to decline in flower production. You will recognize these plants easily: they are in obvious need of division to improve their appearance, health and vigor. Take a look at your daylilies. The ones you need to divide will have thin foliage and fewer flower stalks with less flowers. Typically, daylilies will need dividing after 4 or 5 years.
Daylilies can easily be divided. There are a few steps to follow. What is important is to be careful and gentle. Other than that, the process is pretty much straightforward.
Steps
Here are the basic steps for dividing daylilies:
- Before you start, make sure to prepare the area by taking the mulch away from the plant. You need enough room to work around the clump and you need this area to be clean.
- It's best to use a garden fork to carefully lift the clump from the ground. Place the fork in the ground about 6 to 12 inches away from the base of the plant. Push down the handle gently to pry the clump up. It will remove it from the soil.
- Work around the root ball in the same way described in step 2. You need to repeat this process until the roots are completely freed. Once they are free, you can lift the root ball from the hole. It will still have lots of soil attached. It's important to lift the plant gently.
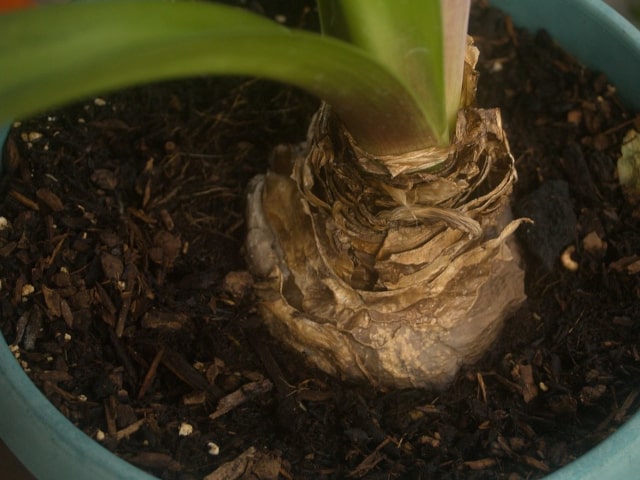
- Inspect the plant. You will be able to easily see any weak or thin areas at the center of the clump. These areas will have thin foliage and less flowering. These are the areas you should target.
- Once you have targeted problematic areas, take two garden forks and plunge them into the clump. Make sure the forks are placed back to back. After you have inserted the forks, push the handles apart gently. This will make the roots separate. The result will be two smaller clumps. This is how you'll get two divisions. In case the original clump is large or if you want more divisions, repeat this process with the divisions you have just made. However, don't go overboard: a division should be strong enough to be replanted so don't make many micro divisions.
- In case your goal is to simply renew your daylilies and make them produce more flowers the next year, this is all you have to do. After dividing them, simply replant them in the ground. You may also want to give these divisions as present to your friends.
Replanting Daylilies
To replant daylilies, dig a shallow, wide hole. The depth of the hole should be a bit smaller than the height of the rootball and the width should be about 6 to 9 inches greater than the width of the rootball. Place the rootball in the hole and backfill with soil. Tamp the soil lightly to put it into place.
You should apply some mulch around the plant to a depth of one inch. This will protect your daylily from weeds and will prevent roots from drying out (also, it will protect the roots from any extreme temperature changes). Water the area thoroughly. To help your plant even more, you may cut the foliage back to the length of about 12 inches. This will help the plant retain moisture while it's getting established.
Keep in mind that new plants you can find in nurseries are typically sold in small clumps or even single sprouts with a single growing point. If you wish to fill a large pot with daylilies quickly, you can plant a group of these smaller divisions in one planting hole. However, if you create your own divisions, it's best to never make them as small as these ones.
With smaller divisions in the garden you should do the same thing as with the larger ones. When you place them in the ground it's important to fan the roots out over the mounds of soil that you have created. When you do it, backfill with soil and tamp gently around the roots. After this, mulch with about 1 inch thick layer and don't forget to water thoroughly.
Dividing your daylilies will make them stronger, healthier and ready to produce more flowers. You will be delighted to see all those flowers in the following year.
Photo credit: Renee Grayson
0 Comments