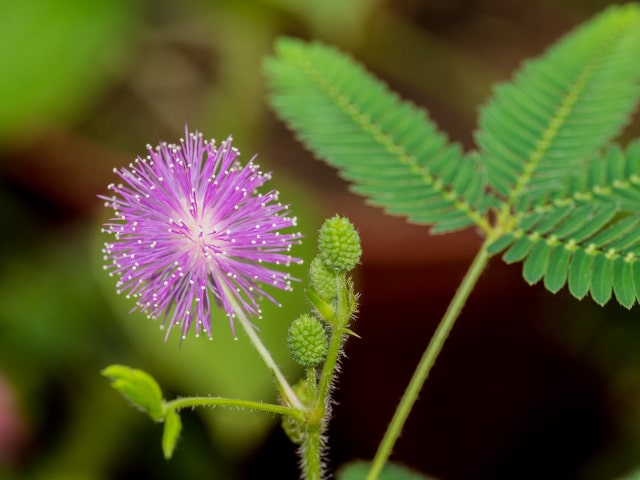
If you wish to propagate your sensitive plant (Mimosa Pudica), there are a few effective methods you can use. The most common ways to propagate this plant is from seeds or using cuttings. While you can use both of these methods, keep in mind that propagation from seeds is the quickest and most effective way to propagate sensitive plant plants.
Propagation from Seeds
New gardeners will probably wish to use propagation from seeds, since this is a quicker and easier method of propagating sensitive plant. While many houseplants cannot easily ne started from seeds, this is not a problem here.
To propagate sensitive plant from seeds, make sure to get seeds of the highest quality. If you choose to purchase seeds, use only reputable growers. Remember: seeds are sensitive and can be easily damaged, so it is important to use only high-quality productions.
Many people choose to get seeds from their own mature plant. This is a great and probably the easiest way to propagate Mimosa Pudica. Simply allow the pods to mature and dry them out. Once they are dried out, you can collect fresh seeds to start new plants.
Before you start the seeds, make sure to weaken the seed's tough outer coating. This coating is brown in color and it tends to be difficult to break, so it is best to place seeds in a bowl of warm water. Allow seeds to soak for a few hours before you plant them.
Make sure to plant seeds during the spring, unless you want to use artificial lighting and temperature control. If you use artificial lighting and temperature, you can start your sensitive plant from seeds at any time of the year.
To plant the seeds, it is best to use seed compost that is moistened by watering it fully and then allowing the excess water to dry out. A great choice of a seeding mixture is 2 parts compost, 2 parts well-rotted leaf mold or coconut coir fiber, and 1 part sand or perlite.
When planting, make sure to place the seeds on the surface of the mixture. Cover them just barely with a light layer of soil. Always plant extras and more than you wish to have, since seeds don't always germinate. For example, you can germinate 2-3 seeds in a small pot, or you may choose to plant multiple seeds in a seed tray.
Once the seeds are planted, make sure to place the contained in a location with bright light. Temperatures should be at least 65-70 F. Ensuring proper light and warm temperatures is important, because the seeds won't germinate without these conditions. In case your home is too cool or dry, make a mini-greenhouse by covering the contained with clear plastic. However, make sure to remove the covering as soon as you see the first seedling appear.
Check the potting mix regularly. You should never allow it to dry out, so make sure to water whenever you notice it becoming even slightly dry. The roots need consistent moisture. However, make sure not to over-water. Your container and plants should never be waterlogged.
The seeds should germinate in about a week under ideal conditions. In other circumstances, it might take them up to a month to germinate, so it is important to be patient. Monitor new seedlings that appear. Once the plants have established themselves, repot them in a medium sized pot that is around 5 inches in diameter.
Propagation Using Cuttings
Propagating Mimosa Pudica from cuttings is not as common as propagating it from seeds, but you can use this method if you wish.
With this method, you need to choose a heathy and strong branch that has one leaf node. You may take more than one stem cutting for propagation, but make sure not to go overboard because you want to keep the original plant healthy.
Take the cuttings and plant them in a growing medium. A good choice is a mix of peat moss and perlite. Make sure that each cutting has enough space to grow properly. Place it in a spot with enough light and temperature.
It is also a good idea to place a plastic cover over the sensitive plants as they start to grow. This will increase humidity around the new plants. However, once you see them growing stronger, make sure to remove the cover.
Photo credit: Esin �st�n
0 Comments