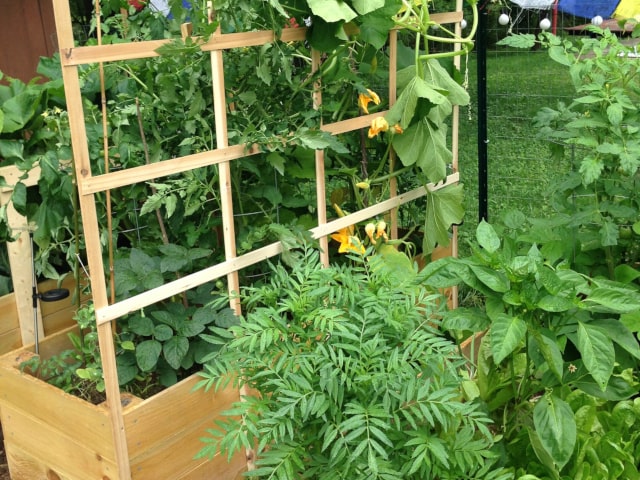
Trellises are very helpful in the garden. It's a proven fact that a trellis can greatly increase productivity of a raised garden bed. A trellis allows all of the vining garden crops to spread, which means they can get more sunlight. In turn, this means they will produce a higher crop yield. This is why a trellis is a great thing to have in your garden.
The good news is that you don't have to spend much money on a good garden trellis. In fact, you can make one all by yourself easily and using inexpensive but sturdy materials. A basic and effective trellis is not so difficult to make, so even if you are not an experienced carpenter you can have one in your garden. All you need are some basic hand tools and materials. You can use these trellises for pole beans, but you may also modify them slightly to fit other crops, such as cucumbers, squash or peas.
Why Using a Trellis?
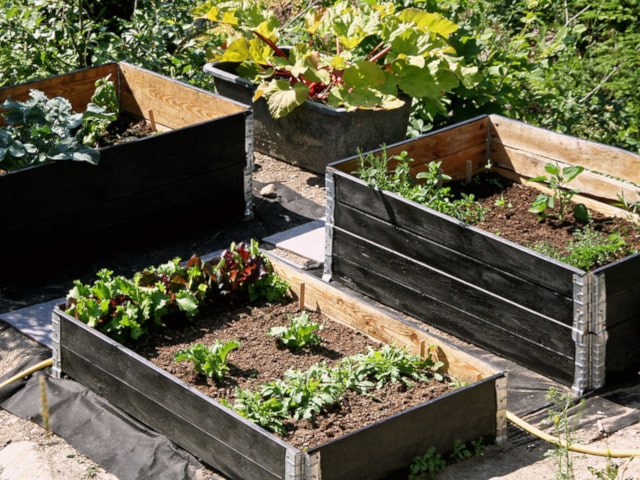
A garden trellis can help you a lot when it comes to crop productivity. It's best to use them with raised garden beds. Raised beds are good because they give you a chance to have a head start on the season. With raised beds, the soil is warmer and better drained than ground-level beds. Raised beds are typically built to specific sizes, but you can greatly improve their productivity by adding a trellis.
A trellis is a good way to give your crops more sunlight and to let them spread more. This results in a higher crop yield. Also, a trellis will keep the crops out of your pathways, so it will give you more space in the garden. Finally, a trellis with a vining crop on it will provide a nice shade for the area behind it, so you can use it for shade-loving plants.
A basic garden trellis is surprisingly easily to build and it doesn't require much money, time or experience. The following method of building a trellis is good because it allows you to set the dimensions of your choice. This trellis design uses strings, which makes harvest much easier than it is on trellises with lattice. Another good thing about this trellis design is that it has a raised horizontal base with enough space underneath so you can easily water your plants. This trellis is easy to disassemble during winter and the installation doesn't leave any visible holes. Easy to build, install and use, this trellis is a great choice for all gardeners who want to have an effective but inexpensive trellis for their gardens.
Materials
To build a basic garden trellis you will need certain materials. You may adjust the materials depending on the dimensions of your trellis. The materials listed allow you to build a trellis frame that's about 6' tall (though you may add extension pieces to make it taller, about 8' to 9'). The width of the frame is about 8'.
To build a trellis of these dimensions, you will need:
- Wood for the frame. It's best to use cedar 1" x 2". You will need six 8' lengths and two 5' lengths.
- Wood for gussets. You will need two pieces of 5/16" exterior plywood, each 14" square. You will need them to make small triangular gussets and exterior grade plywood is best for this purpose because it won't split. These triangles will be used for the corners to secure them.
- Wood for the extension pieces. You will need 11 pieces of thin split cedar (each should be about 5' long). They are used to raise the height of the trellis over 8', which is ideal for pole beans.
- Biodegradable String. It's best to use sisal string because at the end of the season you can simply cut it and throw it all with the vines into the compost. You won't have to separate and reclaim the string.
- Screws and Nails. You will need two sizes of screws: 45 screws of the #8 gauge (1.5" long) - these will be used for the gussets and the support; 14 screws of the #10 gauge (2.5" long). These screws should be the so-called coated deck screws. They are available at all hardware stores. The nails will be used to attach the thin cedar extensions. It's best to use 1" galvanized box nails. You will need 22 nails for this purpose. Make sure to use thin nails so you won't split the cedar when you put them in the wood.
Instructions
This sort of a garden trellis is not difficult to make. It's best to build it in the place where you want to use it, because transferring them from another place may be difficult. To build this trellis, you will first need to built the frame and then attach the two supporting braces. After this, you will add the extension pieces at the top and finally install the strings the vines will use to climb.
Step-by-step instructions for building and installing your trellis:
- Prepare the cedar 1x2' pieces. Take three of the 8' cedar 1x2'. Cut them each to 6'. This will make your uprights. After this, take two of the 8' cedar 1x2' and cut them to get four 46 1/2" long pieces. These will make the bottom and middle horizontal pieces for your frame. After this, take the two 6' lengths and cut them to 53 1/2" each. These will make the top two horizontal pieces. Finally, cut the remaining 8' length to two 42" pieces each. These will be used for the supporting braces.
- Prepare the gussets. You should cut the gussets and screw them onto the bottom end of the each upright. To cut them, it's best to use a hand saw. Mark an "X" across the two 14" square plywood pieces and cut them to make 8 triangular gussets. These will be used to hold the frame together and secure it to the raised bed. You should lay one of the 6' cedar uprights on a bench and put the gusset so its base is about 2" inches below the end of the cedar uprights. Screw them onto the bottom end of the each upright.
- Attach the uprights to the raised bed. Put your first upright to the edge of the raised bed. Use 3 screws along the base edge of the gusset to attach it to the inside of the bed. Take one of the 46 1/2" pieces and put it on the edge of the bed to mark the distance for the second upright. Repeat all of this for the second and the third upright.
- Install the rest of the frame. The next step is to assemble the rest of the frame. The easiest way to do it is to make a small mark 7" up from the bottom of each upright. Alight the first 46 1/2" horizontal piece to the lines and screw it in place (using two 2.5" deck screws) at each end. Repeat for the second 46 1/2" piece. The problem is in the center, because you won't be able to screw from the opposite side because the first piece will be on the way. Here, you should use just one screw. After this, you should add the center horizontal pieces at height of about 3' from the raised bed. Finally, add the top two pieces. Screw in the gussets to hold the pieces in place. Use two gussets at the top center of the trellis.
- Add Extensions. If you want your trellis to be higher (as needed for beans), you should simply attach extension pieces starting from the center. Make sure to space them about 10" apart. Put one nail on the middle horizontal and another where the extension meets the top horizontal.
- Secure braces to the frame. After making your frame, you will have a few 2' lengths of 1x2" cedar left. Take two of them and cut them to about 18" long. Taper one end of each into stakes. Put these stakes into ground so there are 6" inches above the ground. Take the remaining 42" lengths of cedar and screw one end into the stake. Use a level to set the trellis vertically. Screw the other end into the side of the trellis. make sure that the trellis is stable.
- Add strings. The final step is to add strings to the frame. It's best to run them through the holes in the frame. Tie off at the top and bottom. At the end of the season, you can simply cut the strings and use all of the vines and leaves in the compost. This is why it's important to use biodegradable strings.
The best thing about this trellis is that it has a very light frame you can move easily. To remove it, simply unscrew the screws holding the gussets to the bed and detach the two braces.
Photo credit: The Belvedere Blog
0 Comments