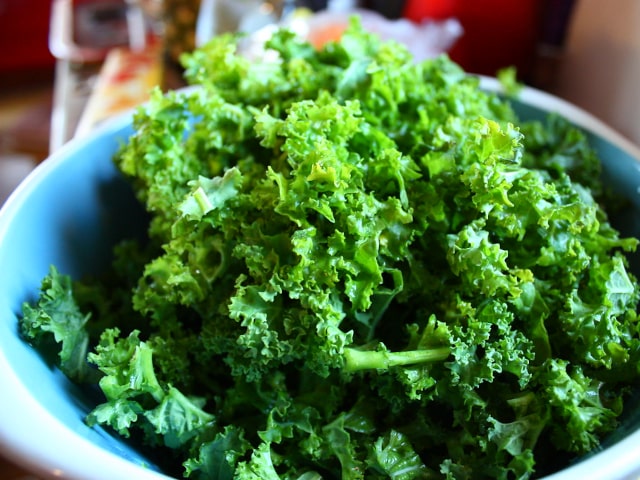
Kale is known as a "super food" because of its numerous health properties. It contains a lot of nutrients and it's one of the healthiest vegetables out there. Kale contains fiber, calcium, lots of vitamins, minerals and anti-oxidants. It's a great vegetable you will sure want to have in your meals.
Kale is usually used as a green vegetable in salads or green smoothies. It's a very powerful and nutritionally healthy food so it's important to include it in your diet. For the best results and the healthiest kale you can get, it's a good idea to grow your own kale.
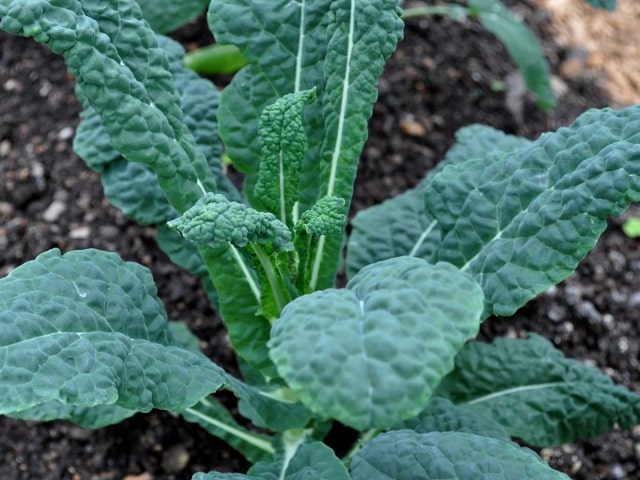
Different Varieties
Before you plant your own kale, it's important to understand its different varieties. These varieties are most commonly grouped by the type of leaf. The most popular kale variety types include:
- Plain leaved kale
- Curly leaved kale (Scots Kale)
- Rape kale
- Leaf and spear kale (this is a hybrid of plain and curly leaved Kale)
- Cavolo nero (also known under other names, such as black cabbage, Tuscan cabbage, Tuscan kale, Toscano kale, dinosaur kale and Laicnato)
Each of these leaf types include numerous varieties you can choose from. It's important to know that different varieties have different growth times from transplanting to harvesting. Here are some common varieties:
- Red Russian (40-60 days)
- Blue Armor (45-75 days, hybrid variety)
- Dwarf Blue Curled (55 days)
- Dwarf Blue Scotch (55 days)
- Blue Knight (55 days, hybrid)
- Winterbor (60-65 days, hybrid)
- Dwarf Green Curled (60 days)
- Konserva (60 days)
- Squire (60 days)
- Verdura (60 days)
- Blue Curled Scotch (65 days)
- Dwarf Siberian (65 days)
- Greenpeace (65 days)
- Hanover Late Seedling (68 days)
These are just some of the varieties you can choose to grow in your home or garden.
Growing Kale
The good news is that kale is not so difficult to grow. It can even be grown in pots, which is a great thing for those who don't have much space. This healthy vegetable doesn't require much care and can be grown in numerous climate conditions. While it doesn't prefer cold weather, it's possible to grow kale in any season and in most climate conditions.
It is, however, important to keep in mind that certain properties of kale will change depending on the temperature, soil conditions and weather patterns. These conditions can influence the flavor, output and duration it takes kale to mature. On the other hand, kale is a strong vegetable and it can adapt to many conditions, so chances are that you won't have much trouble growing it in your garden or your home.
To be one the safe, it's important to keep it on temperatures higher than 20 degrees F but lower than 80 degrees F.
Generally speaking, if you want to start your kale from seed you should expect to have ready seedlings in about six weeks. This is when you will have your new kale seedlings you can plant in your garden or new pots.
When growing kale, it's important to control the pests. Common pests include cutworms, cabbage loopers and cabbageworms. They all love to munch on kale, so you need to make sure they don't spread. If you observe any pests on your kale, get rid of it immediately before they have a chance to do much damage.
When it comes to disease resistance, kale is proven to be strong and able to resist most of the common plant diseases. To keep your kale healthy, make sure to give it all the nutrients it needs. Also, pick off any weathered leaves so they don't attract pests and disease.
Harvesting Kale
The time needed for kale to fully mature depends on the variety (see above). It's important to keep in mind that the time given is the one it takes kale to mature from transplanting until it's ready to be planted. If you start your kale from seed, you also need to account for time needed for seedlings to develop.
Generally speaking, kale is ready to be harvested 70-95 days from seed and 55-75 days from transplanting. For specific growing times, check out the seed package or find information about the individual variety you wish to plant.
Tips on harvesting:
- You may begin to cut individual leaves off when they are mature enough. This usually happens when the plant is 8 to 10 inches high. Always start with the outside leaves.
- If you want to harvest the whole plant, make sure to cut two inches above the soil. In about 1 to 2 weeks, the plant will sprout new leaves.
- While it's important to leave kale enough time to mature, don't wait too long to harvest it. Old leaves will become tough and tasteless.
- In case you can't eat all this kale fast enough so you keep leaving some leaves on the plants and they turn brown, don't worry: you may use them to make compost. Pull them off so they won't attract pests and waste the plant's energy. You may later use them to make compost.
- Kale can be stored in the fridge up to a week. It's best to be kept lightly moist and kept in an unsealed bag in the crisper bin.
There are many different ways to grow your kale, namely, in the ground in your garden or in a container you can keep on your balcony, deck or even inside your home. Growing kale in pots is ideal for those who don't have enough space. Pots are also great for those who want to save some time and minimize the care needed to provide. If you opt to grow your kale in a container, keep in mind that while this is a perfectly ok way to grow kale, you will not be able to get as many kale plants as you can in the garden conditions. This is why this method is suitable for those who don't need much kale.
Kale can be grown in a pot or another soil-appropriate container. An appropriate container must offer at least six square inches for an individual plant to grow. The best way to plant the seeds or a seedling is in the center of the pot. It's important to provide it with a good layer of compost. The seeds should be planted about 1/2 inch deep.
To care for your growing kale plant, give it appropriate fertilization (same as the one given to garden plants, see below). If you grow your kale in containers outside, don't forget to move the containers into a partially shaded area in the summer.
When it comes to planting kale in your garden, there are several steps you need to take t o ensure success and grow strong and healthy plants.
Finding the Right Spot and Time
The first step to a success is to find a good spot in your garden to plant kale. Also, you need to think about the most appropriate time to plant. Keep in mind that kale is a hardy biennial. It takes two years for kale to flower and complete its life cycle. However, it's usually grown as annual.
You can plant your kale in the cool season, but you need to find a spot where it will receive full sunshine. In case you want to plant it during a warm season (or generally in a warmer climate), make sure to plant kale in partial shade.
Another thing to keep in mind are plants you can grow alongside kale to make them all thrive. It's safe to plant kale in the companion of plants such as celery, beets, onions, potatoes and various herbs. On the other hand, kale doesn't enjoy to be planted near tomatoes, strawberries and beans, so keep this in mind when deciding how to organize your garden.
It's best to plant kale in a well-drained, loamy and moist (but not soggy) soil. It needs soil of average fertility. It doesn't like soil that's too rich in nitrogen and thrives in soils with pH values between 5.5 and 6.8. In case your garden soil is too acidic, you may add some wood ash to sweeten it.
While kale seeds can germinate even in the cool soil, they will sprout most successfully if the soil temperature is about 70 degrees. In case you want to start kale seeds inside, do it about 5 to 7 weeks before the last expected frost. if you want to sow the seeds directly in your garden, do it about 2 to 4 weeks before the last frost and at least 10 weeks before the first frost of the next season. Keep in mind: the soil temperature should be at least 40 degrees F or higher to achieve the best germination. Also, keep in mind that the hotter the weather, the more bitter and tough your kale with be. However, even this bitter kale is very nutritious and can be used in the kitchen.
Starting Your Seeds
To starts the seeds, it's best to sow them in small pots filled with a good mix of soil and compost (or veganic fertilizer). Make sure to put the seed at least 1/2 inches deep. Keep the soil evenly moist around your growing seedling. However, you need to allow the top layer of soil to dry between watering.
Alternatively, you can directly sow your seeds in the garden. Do it about 2 to 4 weeks before the last frost date or as soon as you can work the ground in the spring.
This is when you should think about the quantity. If you want to eat kale regularly, you will need about 3-4 plants per family member. It's also a good idea to plant even more seeds or buy more starts to have enough if some of them don't make it.
Preparing the Bed
Before you plant the seed, you need to distribute a good amount of organic fertilizer over the area you want to use. Depending on your chosen fertilizer, you may need to fertilize and then cover the bed and plant about week or two later. If you want to use seasoned compost to fertilize the soil, you can plant the next day. If you want to use mulch to fertilize the soil, all you need to do is to distribute it around the plants after they are in the ground.
Remember, what is considered "a good amount" of fertilizer will depend on the fertilizer type and potency. You should always follow the directions on the package closely. If you decide to go with compost or mulches, you will need to work them in to a couple of inches deep. When it comes to soil amendments (such as seaweed powder or rock dust), you need to simply sprinkle them on the ground.
Planting
If you want to plant kale from starts, you need to start them 4-6 weeks before or purchase them. Place the starts in the ground about 1-2 weeks before the last expected frost. However, it's important to plant only starts that are strong enough to survive the conditions in the garden. They have to have at least 4 true leaves, with a few of the next leaves forming. By this point, the seedling should be about 3-4 inches high.
When a seedling emerges from the soil it will have a set of two leaves - cotyledons. These are not "true leaves" because they don't perform photosynthesis. They are part of the seed and make the seed's first first food source. As the seedling grows, it will develop two more leaves, and these leaves will look very differently than the cotyledons. These are the first "true leaves" on your plant. They will look like the plant's adult leaves, only smaller. Once they emerge, the plant can use them for photosynthesis and the cotyledons will wither and fall off. This is when your seedling is ready to be planted.
Plant the seedlings about 12 to 15 inches apart. It's best to use rows that are 18-24 inches apart. If you're using direct sowing, you can plant the seeds closer. Just make sure to plant the seed at least 1/2 inches in the ground and 3 inches apart. If you're planting thin plants place them about 12 inches apart (they need to be about 4-5 inches tall at this point).
Keep in mind that you have to set all transplants perpendicular to the ground so they can grow straight up. Plant them deep enough so they can be properly supported. However, you shouldn't go deeper than their first leaves. You will probably need to experiment a bit to see what works the best for your plants.
Further Care
Here are some quick tips on how to care for your kale once you have successfully planted it:
- Make sure to keep them well-watered. Kale loves the moist soil. It will keep the leaves crisp and sweet.
- You can make your kale produce more leaves and becoming richer if you use the so-called "side dressing" (fertilizing along the rows) with compost. Do it throughout the growing season, every 6 to 8 weeks.
- Dirt has tendency to stick to your kale leaves, making them rot. To prevent this, put mulch (grass, straw) around the kale when it reaches about 6 inches in height. This will prevent dirt from touching the leaves.
Photo credit: Noelle

0 Comments