Kalettes are tasty plants your can use in your kitchen in many different ways. A great thing about this vegetable is that you can grow it in your home relatively easily, so you will always have fresh Kalettes for your meals. Also known as Lollipop Kale and Brussel Kale, this plant has kale-like leaves. It grows tall stems ringed with characteristic rosettes.You can eat Kalettes in many different ways, starting from raw to grilled, sauteed, roasted, or even blanched like Brussels sprouts. Their flavor is nutty but mild, and it can become sweeter if the plant went though the frost.
Keep in mind that Kalette seeds might be expensive, because they are considered a novelty vegetable. However, they are healthy and tasty, so the price is generally worth it.
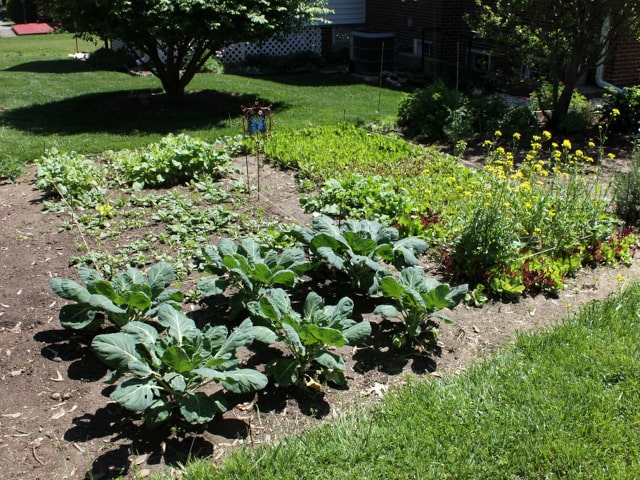
If you wish to grow Kalettes in your garden, keep in mind that they generally require a long growing season and high fertility of the soil. They are not particularly difficult to grow, but you need to provide them with specific conditions that they require.
How to Grow Kalettes in Your Garden
If you wish to grow Kalettes in your garden, keep in mind that there are three popular varieties to choose from. Each variety has its own germination and maturity time, so keep this in mind before buying seeds.
Snow Drop takes the longest time from the seed to the mature plant. It takes about 138 days after planting. Mistletoe variety generally needs 124 days from seed to the mature plant. The quickest-growing variety is Autumn Star, which takes 110 days after planting of the seeds to reach maturity. So, around 4 months or all the varieties, give or take a few weeks.
If you wish to grow Kalettes in your garden, you should first start the seeds inside of your home. That is the best way to germinate the seeds and start the new plants. You should keep your new seedlings indoors for about 4 to 6 weeks after they sprout. A good spot for the seedlings is a sunny windowsill. Another possibility is to keep the seedlings in a greenhouse. Whatever you do, make sure to keep them indoors and protected from the elements.
After this time, you may transfer your Kalette seedlings to your garden. However, you need to be mindful of the weather. Ideally, you will need to time the germination of the seeds and seedling 4-6 week growth to coincidence with the first frost-free time in the year. It means you should plant seedlings as soon as the risk of the frost has passed. You should check the forecast and calendar in your area to know when this date is.
If you don't want to risk it, you can transplant your Kalettes to the garden in June or even July. If you do this, you can expect a harvest in the early fall. If you live in a very warm area, you may even wish to transplant your seedlings into the garden during August, which will give you a late fall or even early winter harvest. For even hotter climate, you can transplant Kalettes in the garden in September and enjoy a winter harvest.
Make sure to space individual seedlings about 18 to 24 inches apart. Give them plenty of water regularly to make them thrive.
When growing Kalettes in the garden, keep in mind that they like soil that is rich in nitrogen. You need to ensure that the plants get this nutrient, so you may add a few inches of compost around your plants. Alternatively, you may add some well-aged manure directly to the soil before you transplant your Kalettes to the garden. You can also add a bit of blood meal at the roots of each plant. This will provide a nitrogen boost for your plants.
Another thing you may try to give a boost to your Kalettes and to ensure that they are healthy, is to add some lawn clippings or mulch around the plants. Just make sure that the plant material is not treated with herbicides. You should also spray your Kalettes with fish emulsion or compost tea every 2 weeks or so. This will provide an additional nitrogen boost to your plants.
Sometimes, Kalettes may be slow to mature, and you might be getting anxious if the end of the season is approaching. In this situation, you can speed up the maturation process a bit by pinching off the growing tip of the plant once you notice that the lowest rosettes on the stem are about half of an inch wide. Do not throw away the pinched tops - you can cook them or use them in your salad, just like regular kale.
You should harvest your Kalettes when their rosettes reach the size of 1 and a half inches. Remember that not all rosettes on a single plant will mature at the same time.
Potential Problems
If you wish to grow Kalettes in your garden, keep an eye on the potential problems you may encounter. These vegetables have numerous pests and some diseases that can ruin your harvest. Most of those pests and diseases are similar to those attacking other kale varieties.
Lack of nitrogen, lack of water or soil that is too acidic can result in stunted plant growth. You should boost the nitrogen content for your plants, and always make sure to water your Kalettes regularly. If the soil in your garden is acidic, sweeten it by adding small amounts of wooden ash to it.
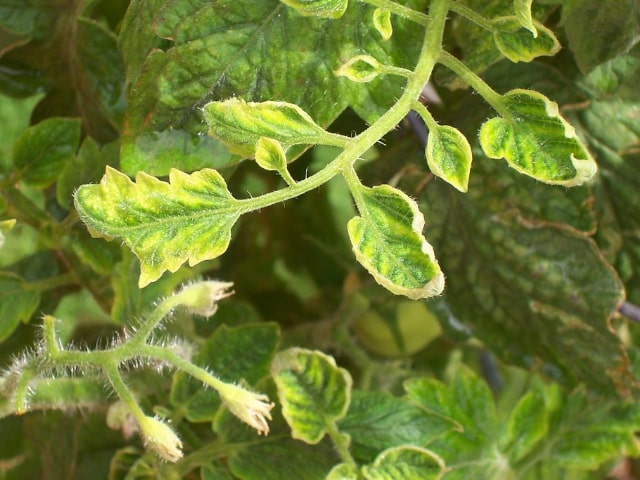
Downy mildew will cause yellowish spots on the leaves. These will grow white downy moldy during the wet weather. Make sure to observe your Kalette plants regularly, so you can catch the disease early. You may try spraying your plants with an organic fungicide. However, if downy mildew is advanced, it is best to remove and destroy the affected plants. Never use these plants in compost because it can spread the infection.
Pests can manifest themselves in numerous ways. Even if you don't notice pests, they can be recognized by the fact that your plants are getting weaker. Leaves that curl, turn yellow or pucker are typically a sign of whitefly or aphid infestation. Inspect the undersides of the leaves to locate the pests. Use organic insecticides to get rids of them.
Other pests, like cabbage worms or different types of caterpillars, can cause ragged holes in leaves. Smaller holes in the leaves are typically a result of the flea beetle infestation. Observe your Kalettes carefully to notice this issue as soon as it develops, or else the pests will ruin your harvest.
You may use row covers or agricultural fleece to shield your Kalettes from pests and unfavorable weather conditions.
Photo credit: woodleywonderworks
0 Comments