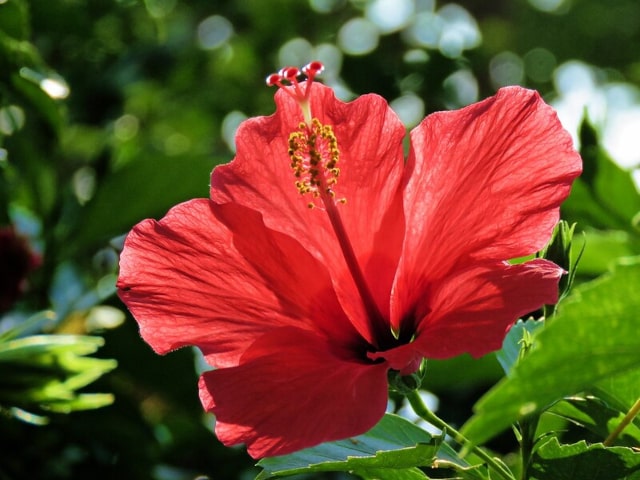
Hibiscus is a gorgeous plant with beautiful foliage and amazing flowers. You can grow it both in the ground and in a container so it can live both indoors and outdoors. It means that many people can grow it in their home or garden. Hibiscus is a great plant that will add a bit of a tropical feel to your home. A great thing is that there are many different varieties to choose from. This is great because you can choose the one that suits your needs perfectly.
Hibiscus can grow in a limited space such as a container. This plant is very tolerant to cramped space to grow its roots. However, it will outgrow its container at one point, so this is something you need to worry about.
Once your hibiscus becomes too big for its own container, it's time to repot it. This is not particularly difficult but you need to do it carefully so you don't harm your plant or its roots.
Does My Hibiscus Need Repotting?
Before you move your hibiscus in a new container make sure to check if it really needs repotting. You should not move a plant to a new container unless it's ready. Hibiscus plants can grow in containers just fine, so you should never assume that it needs repotting. It is important to know how to recognize the signs that your hibiscus is ready for repotting.
The best way to check this is to look at the drain holes in the container. If the roots are protruding through the holes your hibiscus is ready to be repotted. It means that the container is getting too small for its roots.
To be completely sure, try to loosen your hibiscus in its container and lift it up. This will allow you to take a better look at its roots. A clear sign that your hibiscus needs repotting is if you see that the roots are packed tightly together. Also, they may form a pot-shaped circle that is very tight. All of these are clear signs that your hibiscus needs repotting.
Tools and Materials
Here are the basic tools and materials you'll need for repotting your hibiscus:
- New container
- Growing medium (potting soil or soilless medium)
- Sharp knife or scissors
- Pruning clippers
- Mulch (organic or decorative)
Repotting Your Hibiscus
It is relatively easy to repot your hibiscus. All you need to do is to prepare all the tools you need and follow a few simple steps. Before you start, however, make sure you are doing it at the right time. You should never repot your hibiscus in the winter since it would take your plant too long to recover from the process.
Here are the steps for repotting your hibiscus plant:
- Choose a good container. It is important to pick the right container for your hibiscus. If you want your hibiscus to stay at the same size as it is now, you may choose a container that is about the same height and diameter as the present one, just with a bit of space added (a few inches the most). If you want your hibiscus to grow more, pick a bigger container. However, keep in mind that you should not choose a container that is way too big. It is not good to jump from a crowded container to a huge one. When choosing a new container for your hibiscus, make sure to pick the one that has a lot of drainage holes or channels. In case the drainage holes on the container are too large, you can add a small piece of screen to the bottom. This will prevent the soil (or another potting medium) from running out of the pot when you water your hibiscus. Also, the best containers for hibiscus plants are the ones that have about the same height and width.
- Add medium. You should add about 2 inches of potting soil or soilless growing medium. Make sure to moisten it with water. It is best to use light growing medium that will drain well. It is also important to choose a medium that has at least some organic component. A good choice for a potting medium is potting soil made for hanging plants. This one typically has good drainage and will work great for your hibiscus.
- Remove your hibiscus from the old container. Make sure to loosen your hibiscus carefully. It is important not to hurt your plant or its roots during this process. Gently, lift the hibiscus and shake it. It is important to be very careful during shaking so you don't hurt your plant. You need to shake it to remove the old soil (or another potting medium). There is typically a lot of it attached to the roots. However, it is very important to do this gently.
- Loosen tangled roots. Since the hibiscus has been growing in a container that is too small, expect plenty of tangled roots. You need to loosen them before you repot your plant. You can loosen them with your fingers, just make sure to be gentle. In some situations, the roots may be tightly wound together and impossible to loosen them. In this case, you can slice through them with a sharp knife. After this, simply continue untangling the roots.
- Prune the roots. You need to do this if you wish your plant to stay about the same size. Prune about 1/3 of the roots. If you prune this much you can actually repot your hibiscus into the same size container as the old one. However, in most situations, it's best to use a container that is at least a bit bigger than the previous one. In case you want to repot your hibiscus into a larger container and make it grow even bigger, all you need to do is to trim away broken roots. In this case, make sure not to prune too much.
- Place your hibiscus into the new container. Be careful while doing this so you don't hurt the plant or its roots. It is important to make sure that the hibiscus is not deeper in the new container than it was in the old one. It means that the top of the root ball should be about 2 to 4 inches below the rim of the container. If this isn't the case, simply add or take out some soil (or another growing medium you use) to raise or lower your hibiscus in the container. Once the plant is in the optimum depth, simply add the rest of the growing medium in the container. Once you fill the container with the growing medium you need to make it settle around the root ball. To do this, simply tap the container on the counter or lightly shake it. It will help the growing medium settle around the root ball. If needed, add more growing medium for proper height. This will prevent the growing medium from running out of the top of the container when you water your plant.
- Water your hibiscus. Once it's repotted, you need to water your hibiscus thoroughly. Make sure not to overwater it, though. At the same time, keep in mind that your plant needs water at this moment so don't just sprinkle it around the base. You need to water it thoroughly.
- Add mulch. Once the watering is done, spread about 1 to 2 inches of mulch around the base of the plant. You can use organic or decorative mulch for this purpose. Make sure to place it on the top of the growing medium. The mulch will help conserving moisture. Leaf and bark mulch seem to work the best since they look attractive and they can add some nutrients to the container as they decompose.
Once your hibiscus is repotted and watered, make sure to move it to a place without bright, direct sunlight for a few days. You need to keep it there so it can recover and establish itself. After a few days, you can place it back where it was before repotting or you can find a new location for it. Whatever you do, however, make sure to choose a place with plenty of sun.
Photo credit: John Bonham
7 Comments
I live in Minnesota and have a potted Hibiscus that we have been growing for about 10 years taking it in for tg3 winter months then putting it back outdoors in the summer. We have repotted it once during that time. Two years ago, we moved and in order to take the plant with us! I needed to prune it to fit in our vehicle. It survived. Now, we are at a point of deciding whether or not to take it in this fall because it is simply getting too big to occupy space inside our house. Can I do a heavy prune to get it smaller before taking it in. If so, when would the best time be to do that and how aggressive can I be? Thanks!
I have 4 potted plants that were started by roots purchased thru the mail. The plants are about 2 feet tall and put on a lot of buds, but most dried up. It's over 100 degrees in South Texas and I moved them from partial shade to more sun. They started dropping leaves and has scorched leaves. I moved them back into mostly shade and cut them back by about 1/3. Should I repot or what? I'm confused as to what I should do to make it bloom, or is the middle of August too late in the year?
Tks for the info... My new pot is twice as big as the black container it came in from the garden center... Hope my tri colour plant flowers well all summer long...
You say not to repot in the winter, but is there a preferred time? Should it be late spring, mid-summer, end of summer? Thank you
Thanks very much - needed to know how to re pot my hibiscus hope I do it right.
pleased I read this article.
Maggie
Thanks for the good info on hibiscus plants... I think this will help my plant bloom.