Calla Lillies are beautiful plants you can grow to make your home more beautiful. However, it is important to repot it from time to time. This is the only way to make your Calla Lily thrive. Before you repot your plant, make sure that it is indeed ready to be repotted. Remember, there are times when you need to repot your Calla Lily but also those when it's best to leave it alone for a while.
When to Repot?
How to tell when it's time to repot your Calla Lily? It is very simple to recognize this: once it has become root bound, it is best to move it to a larger container. The old, smaller container simply doesn't have enough space for the plant's roots.
The main sign that your Calla Lily needs repotting is a noticeable crowding of roots. Another telling sign is a decline in plant vigor. The main sign of this lack of vigor is that the plant will stop flowering. If any of these things happen it is for the best to repot your Calla Lily. You can repot it in a larger container or you may replant it outdoors.
How to Repot
Repotting your Calla Lily is very easy. You just need to have a new, larger container ready and to work carefully not to damage your plant. All you need to do is to remove your Calla Lily from its original pot and move it to the larger one.
With many other plants, you repot by loosening or disturbing the roots before you move the plant out of the container. You don't need to do that with your Calla Lily. Simply move it to the larger pot, place it carefully inside and add enough soil to fill the container to about 3/4 of an inch from the rim.
Care Instructions after Potting
Remember, your Calla Lily needs care after repotting, but you don't need to focus too much of your energy on it. Just make sure to keep it consistently wet after repotting. Also, remember to provide your Calla Lily with some weak liquid plant food every 3 weeks or so. You need to do that as long as your Calla Lily shows signs of new growth.
It is best to grow your Calla Lily at a sunny window. It needs temperatures of about 70 degrees F.
The further care after repotting is basically the same as the regular Calla Lily care. Make sure to remove the flowers as soon as they begin to fade. Once your plant has finished blooming, you need to allow the foliage to mature. Reduce watering gradually until the leaves have died back.
After this, leave tubers to rest for 2 to 3 months in the dry pot. If you have a yellow Calla Lily (Zantedeschia elliottiana) make sure to expose tubers in a warm, dry room for about a month (it is important to let them be exposed to warm air for at least 3 weeks).
You can repot the tubers in fresh soil after the ripening period. Simply repot them and start growing your Calla Lily in the usual way. However, make sure to water sparingly until the new growth is well above the surface of the soil. After this happens, you can keep the soil wet. Make sure not to feed your Calla Lily until it becomes root bound again.
Also, keep in mind that you can plant the ripened tubers outside when the soil and air temperatures are warm enough. You should not do that before spring because Calla Lily tubers are frost tender. Keep in mind that you should not leave your plant outside so you will need to dig up the tubers in the fall and take them inside.
Planting Calla Lily Outdoors
Those who wish to have a colorful garden can plant their Calla Lily outdoors. Typically, this plant blooms from late May through October. There are different varieties that are more hardy than the others, so think about your climate and outside temperatures when deciding on the best Calla Lily variety to grow in your garden.
Also, keep in mind that you can always replant your Calla Lily from the container to your garden, if this is what you prefer. In fact, potted plants will thrive after being replanted outdoors. However, you need to take a good care of them and ensure that they have all the right growing conditions to be healthy and strong.
If you want to replant outdoors, choose a sunny or a partially shady area. The soil has to be rich in organic matter and well-drained. It is best to plant your Calla Lily outdoors in the fall, sometimes from September to early October. It is vital to do that before the ground freezes.
Make sure to plant about 6 to 8 inches deep. It is also important to add a layer of mulch. This will keep the bulbs cool and help retaining the soil moisture. You should also add some slow-release fertilizer in the spring. Do this only after the new plants reach about 6 to 10 inches in height.
If you want to replant your Calla Lily outdoors, keep in mind that it needs consistent watering regime and protection from strong heat. If your plant is stressed, it will not bloom. Another problem that your Calla Lily might face outdoors are pests. The most common pest is the Lily aphid (Neomyzus circumflexus). This insect feeds on plant fluids and can slow the growth of your Calla Lily. You can use an insecticidal soap to control the pests. When it comes to diseases, Calla Lilies are susceptible to root rot, especially when they sit in water. This is why it's so important to plant your Calla Lily in soil with good drainage. You should never allow it to sit in water for too long.
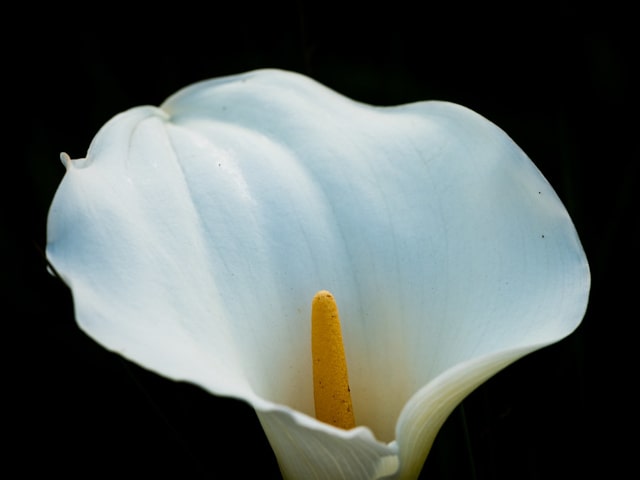
Photo credit: Sharon Mollerus
7 Comments
May 19, 2019 I have had my large bloom yellow Calla Lilies since 1990. I grow them in pots on my deck in the summer. In the fall I leave them out until almost Nov until leaves die back. Then put in basement for the winter. For the last three year they have started to grow in the basement earlier and earlier when its too cold to put them out. The stems/leaves get three to four feet and fall over so that I have to cut them off. This year they started growing in January and laves got all tangled with each other and had to be cut apart. I don't know now how to handle them, Can I prune down to the bulb and replant them in new dirt this spring even though they have done all this growing?
I was given a beautiful deep Burgundy Calla Lilly. Seems like a lot of work as I am not too savvy in caring for plants. I hope I can keep it for a while?
What kind of dirt mix to replant Calla Lily?
It's growing tall with flowers, have to get it in new pot.
Great information given in an easy to remember way. Thank you.
I just bought a beautiful Calla Lily today, the flowers are the colour of an aubergine. I wanted to know how to look after it as I have never had one before. I have found your information to be most helpful and hopefully it will be a success. Many thanks.
Thank you for your help with the Calla Lily. My grandkids got me one for mothers day, I have not care for one before so I was worry about how to repot, it's was root bound. I just did like I repot my other plants but it still looks like it's needs something so what I'm getting at is it looks bad. The blooms turn brown before it opens all the way. I would like to know what you think I should do ?
I'd like to keep my Calla Lily inside. Should I repot as mentioned, to a larger pot when roots over flow the original
pot? Thanks for your help.